« February 2010 | Main | April 2010 »

March 27, 2010

Austin Credit Card

Jenny at work, who adores Austin, has pictures of him that she has printed out on regular paper all around her desk. She has almost as many Austin pictures as she has pictures of Johnny Depp. So for her birthday last week, her friends gave her two framed pictures of Austin, so she would have something a little nicer than paper pinned to her cube. One of them was a picture I had take one day when I was taking pictures of flashlights outside during the daytime to get better light (my camera doesn't take good pictures indoors). Austin got tired of me doing that and laid down. So I got a picture and it was one that Jenny printed out and then was one of that was framed for her. So that got me thinking that when I got my Capital One card, I could pick any picture and I had been waiting until I got a good picture of the dogs to use. So I went ahead and ordered a credit card with this picture on it:

austincc.jpg


March 23, 2010

Fresh Ground Coffee

I've been using my Aeropress coffee maker for a couple of months now, making coffee a few times per week. After researching how to make a good cup of coffee I was looking forward to getting some fresh ground coffee once I worked through my brick of Publix decaf. At some point the Sunday paper came with a coupon for a free bag of Millstone coffee and even included the bag that you would take to the store. I scoped my Publix but all they had was pre-ground Millstone. Kroger had whole beans and a grinder, but the only type of decaf I saw was for Hazelnut flavor. With less than a scoop of the Publix brick left, I went to Kroger at Toco Hills today hoping they would have straight decaf. It turns out they did have it!

I have never ground coffee before. I remember Mom doing it when we were kids and would go to the grocery store with her, but not much more. I had looked at the machine earlier and noticed that you could vary the coarseness of the grind from French Press (big chunks) to Espresso (fine powder). In between that is Automatic Drip Coffee. The Aeropress says something finer than ADC is needed, but reviewers said an Espresso grind is harder to press the water through the filter.

So first I got my bag out that I had been saving for over a month and put it under the bean dispenser. I raised the bar to release beans and they came out pretty quick. Now it seems like when that bag came it said that I could put as many beans in the bag as I wanted for free, but the coupon itself turns out to say that I could get a free half-pound bag of coffee (up to $4). Well, the bag holds a pound, so now I had a full bag of beans and it's not like I can put them back in the dispenser. While I was doing this, I noticed that the grinder was making a little noise even though I hadn't put any coffee in yet . . .

So I pour some beans into the grinder and coffee grounds start coming out of the bottom! They're just going out into space because the bag I have is what is supposed to collect the grounds. So I think I should put the bag underneath, but it still has beans in it. So then I would have a bag of beans and grounds which would be no good. So what I really need to do is dump the beans in the grinder as fast as I can and put the bag under the dispenser. This is crazy. So I dump more beans in there and the grounds come out about as fast as I can pour. I have a store circular on newsprint, so I use that to catch some of the grinds while I pour the rest of the beans, but I've already missed a lot of coffee. Then I put the bag under there and realize I never set the grinder knob to between ADC and Espresso. So maybe the last couple of ounces are the right grind. Then I dump all the coffee grounds from the store circular into the bag. I wound up with just over half a pound of coffee grounds and a big mess.

Once I was done grinding my coffee I realized there is an On and Off button for the grinder and the person before me had left it On. So all I had to have done was turn the thing Off and I would have been fine. Live and learn. Plus I still had to pay something for the coffee and I'm not at all sure the cashier rang the coupon up correctly, so I may have paid full price of something like $9 per pound for this stuff. It was $5 and change and I was supposed to get $4 off. That's a lot more than the penny I'm used to paying for the Publix brick on mystery coupon day.

I have read where you should use fresh ground coffee as soon as possible and either buy only enough to last two weeks (which would be a couple of ounces for me) or freeze the rest. But today should be good. I've got freshly ground coffee and the stuff on the top is even ground to the right grain size. So I heated up some water for the Aeropress. I have got this down to a science now.

First I heat up 8 oz of water from my filter pitcher in the fridge (it's important to have good quality water) in a measuring cup for 4 minutes in the microwave. This gets the water to a boil. But perfect coffee brewing temperature is 200 degrees, not 212 degrees. And the Aeropress people say to use water that is only 175 degrees. So what I do is take that water and pour it all into my mug and let it sit for a few seconds to warm up the mug and bring the water temperature down. Then I dump the water back into the measuring cup and put the Aeropress on top of the hot empty mug. Then I pour about 6 oz of the water into the Aeropress and stir for 20 seconds (the instructions say 10 seconds, but I'm only using one 2-tablespoon scoop of coffee instead of two in order to make it last, and I'm still using twice as much as I was using with my little Mr. Coffee). After I stir and maybe a third of the coffee has already drained into the mug (unavoidable), I put the plunger in the top and let it sit which stops anymore water from draining through the bottom. So the coffee steeps a little longer. Then I pour a couple of ounces of milk into the measuring cup along with whatever water wasn't poured in the Aeropress and put that in the microwave for 30 seconds. While that's going, I push the plunger down slowly and have squeezed out all the coffee and air by the time the microwave goes off. Now I can put in the milk and water mixture to get a full mug and then add some sugar. Coffee!

Yes, this is better coffee. It seems like good coffee has a richness to it that stays on your breath, maybe from the oils that are in the beans. And this definitely has that. The old grounds still taste like coffee to me, but they lack that aromatic richness. And this is even decaf. It's still good.

Because the Millstone bag is paper, I dumped all of those grounds into the empty Publix brick bag, since at least it is foil. I roll the top of that and clip it to keep air out. Then that goes in a metal canister which hopefully will help keep the grounds fresh.


March 21, 2010

Driver Swap

One of the key components of a flashlight is the driver, which is the electronics between the battery and the LED. The primary function of the driver is to regulate the voltage going to the LED. So if you have a 1.5V battery, the driver will increase the voltage to the 3.6V or so that a LED needs. If there are 2 3V batteries, a driver is needed that will reduce the voltage from 6V so that they won't blow out the LED. But drivers can also give different light levels or provide strobe and SOS modes.

Not long ago I bought a flashlight that uses P60 drop-ins. The advantage to that kind of light is it uses a bunch of standardized parts that can be swapped out. So of course I was on the lookout for some kind of modification (or "mod") I could do to the light. It is a good light, but comes with 5 modes by default (High, Medium, Low, Strobe, SOS) and always comes on in High. Really I would rather have a 2-mode or 3-mode light that would remember what mode it was in last. If you want Low, it stays in Low until you change it. Well, obviously all I would need to do is find a new driver.

There are hundreds of drivers it seems like. But one of them was intriguing to me because it offered several different sets of modes that could be selected by soldering on some jumper wires onto the circuit board. By default, the light comes with 5 modes and is designed to take up to 4.2V. That works fine since I keep a 3.6V lithium-ion battery in that light and it is 4.2V when fully charged. But if you solder a wire from ground to the first of four star-shaped pads on the back of the driver, it becomes a 2-mode driver with High and Low. Extend that bridge to the second star and it becomes a 3-mode driver with High, Medium, and Low. And it remembers the last mode. This seemed so neat I couldn't *not* buy it. It was only $5 so I bought one when I was buying another light that I had my eye on for a long time.

bottom.jpg

First I had to disconnect the old driver. There are two wires coming from the LED that connect to the driver board. I was able to melt the solder pad connecting the wire and it came right off without damaging anything. Then I had to find out where to attach those wires to the new driver and I found this post which some people said worked. That was tricky because this board is very small and already has a bunch of stuff crammed on it that could be damaged by a hot soldering iron. But I managed to get the wires soldered in securely to the right places. Because the driver board fits at the top of the battery chamber, it has a spring mounted to the bottom of it, so I had to unsolder the old spring and solder it to the bottom of this board which went pretty well too. Without messing with the stars, I wanted to test everything out, so I put the board in place, put the battery in and pressed power. Nothing. Either I had fried the board or one of the connections was bad. What I realized was that the board itself was not making good contact with the brass housing which carries the negative charge from the other end of the battery. Usually there is a glob of solder along the edge of the board to make this contact, so I added one and tried it out again. Voila! It worked. But it was five modes. So now I sat down and tried to figure out how to connect the stars. I looked for some wires I could stick in the little holes next to the stars, but the wires I had on hand were too big to go in there. Then I thought I could just put a big blob of solder in between the stars to connect them. But the green part of the circuit board is designed to resist solder, so I couldn't get a connection that way. Then I bent a wire in two to make a little jumper which was really hard to get on there.

top.jpg

Finally I straightened the wire and just laid it down across the stars and soldered at each star. That worked really well and had the advantage of being reversible. So I soldered two stars to get 3 modes. I tried it out but it seemed like I was getting Low-Low-High. I think the Low and Medium are just really close together. I had noticed this a little when it was on 5 modes too, but it didn't bother me then. Well, that is kind of pointless, so I rearranged the jumper to connect to only one star and converted it to two modes which works just fine. Really Medium just gets in the way anyway.

More info about this driver here.


March 20, 2010

AKOray K-106 3-mode Programmable

This light has already been reviewed once by sb56637, so this is just my take though the conclusions are mostly the same. This light is very popular among flashlight enthusiasts due to having 3 programmable modes and remembering the last mode you were in. Most budget lights always include one or more strobe modes, including this one where the default settings are High, Low, and Strobe. So it is very nice to be able to get rid of the strobe mode. Also 3 modes provides a very good mix. One mode will always be maximum, and it is nice to get a good low of less than 10 lumens for looking at things up close. The middle mode can either be closer to max to give good output but longer battery life, or closer to to low, especially if the low is set very, very low. The ability to program levels puts this light in league with other programmable lights like the JETBeam, Liteflux, and the Nitecore D10.

AKOray K-106 Flashlight


Battery: AA or 14500 li-ion
Switch: Reverse Clicky
Modes: 3-mode, programmable with memory
LED Type: Cree XR-E Q5
Lens: Glass
Tailstands: Yes
Price Payed: $19.20
From: KaiDomain

Pros:

  • 3 programmable modes
  • Very good build quality

Cons:

  • Difficult to program
  • Not as bright as I hoped
  • Poor tail clicky

I put off buying this light from DealExtreme because people seemed to report some crazy high current draws, blue tints, and then lately the erroneous "6-mode" description the light has always had has been turning out to be correct. I certainly didn't want to get stuck with a 6-mode light, especially for $6 more than the 5-mode light. Even the description at KaiDomain is a little misleading, saying it has 3 modes plus variable output when really all 3 modes are programmable.

All of the pictures here can be clicked on for a version twice the size shown.


I won't try to explain how to program the light. There is already a good writeup here. However, I will comment on the difficulty I had in programming this light. First the tail switch seems a little grabby. When I press it, it seems like it is resisting a little, even when I let go it feels like it is sticking some. It is one of the worst clickies I've come across. So that affects the operation a little since you have to half-click five times to get to programming mode. I had a really hard time getting to programming mode, but now I have a pretty good method that works most of the time. I turn the light on then halfway hold the button so the light is momentarily off. I do this for five seconds (everything on this light seems to be set around a 5-second off) and then let go to turn the light on. Now I halfway press five times to get into programming mode. I have to do this pretty quickly and sometimes I think I still just end up setting battery protection (3 half-clicks) or just end up 5 modes past where I was.

You know you are in programming mode because the light flashes once, then waits a few seconds before starting a brightness ramping sequence that is quite fast. By the time you realize what is going on, you are halfway to max. Therefore I think it is best to set the first mode to High by half-clicking at the end of the first brightness ramping or waiting for the light to flash off and back on again where it holds high for a couple of seconds. Then, after two flashes to indicate Mode 2, set the next one to low by pressing as soon as you see any light. Then after 3 flashes wait until ramping reaches a good medium and turn the light off (not a half-press or you'll be back to Mode 1). Now you have programmed H-L-M, but with the memory and cycling through the modes, that is the same as L-M-H. It is easy to set High, but not at all easy to set a good Medium or catch the lowest Low. It took me a lot of tries to get a very low Low and a decent Medium along with High (and in the right order, sometimes it would H-M-L).


Using an ampmeter at the tail, you can test to see if you are getting the separation you really want. Using a fresh Eneloop, I measured 0.04A, 0.28A, and 1.36A. I could use a little higher Medium, but the Low is very low. So to program the light, you have to be very quick, and also know what you are doing. This will come with time, but certainly is not easy with the light right out of the box. The other modes are a double-blink mode and a variable strobe. There may be two different speeds of the double-blink available. The strobe is variable from pretty slow to quite fast which is a neat idea. The SOS mode is really SOSO (though as other have pointed out, if they are looking for a lost camper at night, I don't think rescuers would just ignore someone flashing SOSO). The variable strobe and SOS are much easier to pick out of the ramping sequence. If the brightness ramping was slower, this would be a much better light. In fact, if they offered 6 fixed brightness levels to choose from like the Quark tactical versions, that would allow more defined control and would be enough levels to make most people pretty happy. If this was a high-end light, I don't think people would tolerate the awkward ramping, but because it is a $20 light, people are glad to have the feature for the price.

Build Quality

Build quality is very good. The finish is not as dark as some other "natural" lights that I have, but I like it well enough. I've never understood how having a glow-in-the-dark tail cap can be that useful (the only way to make it glow outdoors is with another flashlight, but if you have another flashlight, you won't have any problem finding this light; so about the only time it would help is in a power outage where the light is sitting out already and the room goes from bright to pitch black). My Fenix uses an orange tailcap, so the Akoray orange works well too. Here are 4 "natural" colored lights: the iTP A3 EOS, AKOray K-106, Fenix L1D, and the Uniquefire S10 (which is called silver, but has a light mint-green color).

iTP A3 EOS, AKOray K-106, Fenix L1D, Uniquefire S10

The knurling and exterior finish are very good. There were no flaws, chips,or scratches. There is something about the diamond knurling and the light-colored finish that makes the surface look like it is almost glowing. The closer you get, the better it looks.

The threads are big and rectangular which people seem to like more than triangular ones. They seem well made. There was a chalky squeak when I took the head off the first time from the anodized threads rubbing, but the tiniest amount of lube solved that. With a little more on the o-rings, this things feels very smooth. The only thing is that it seems like the head should screw on a little more than it does, leaving a small gap.

I didn't see how the light could be waterproof with the clip's wires sticking into holes in the side until I removed the tailcap (this is a very thin tail cap, not like any other light I have, and not one you will want to unscrew regularly) and saw that the ends of the wires are outside of the tail switch boot and the holes don't affect the watertight integrity.

At first I wasn't able to unscrew the pill out of the head, but with some small needle nose pliers bearing on two small slits, I was able to unscrew it. The reflector is aluminum and the lens is glass. There was a plastic piece over the LED to keep the reflector from making contact. Usually it is just a piece of plastic film or paper, so that is pretty good. The LED just sits on the pill, so I decided to order a Cree XP-G R5 to put in there. It seems like others have had mixed success with that upgrade. One person on CPF loves his, but another said he got blinking which seemed to indicate an overheating alarm. We'll see. It's kind of an expensive upgrade ($10.90 at KD). I'm still not sure how to actually open the pill. There is a plastic disk on the bottom with a brass center instead of the usual circuit board soldered in place.

Diassembled head

LED assembly

Battery Life

I have a pair of Trustfire 14500 lithium-ion batteries. They are 900mAh blue protected cells. I run the light and stop every 15 minutes to check the voltage on the battery (not under load) and the current draw (under load) at the tail until the battery gets down to 3.6V. I ran a test on the first one and it was so short that I ran another test on the second cell and got basically the same results. First cell:

Time Volts Current (mA)
0:00 4.21 610
0:15 3.91 660
0:30 3.69 720
0:45 3.55 770
Time Volts Current (mA)
0:00 4.22 600
0:15 3.93 670
0:30 3.68 740
0:45 3.58 770
45 minutes isn't that good and even worse given the current draw is only 600mA to start with. I know the batteries still have some juice left in them at 3.6V, but I'm only getting about 500mAh out of these batteries. However, it does seem to be pretty well regulated, drawing more current as the voltage goes down. These results seem to agree with the runtime chart here. On NiMH batteries (2000 mAh Eneloop AA), it is a different story. The light stays on for a lot longer but definitely dims as the voltage drops. Even with fairly small drops in the battery voltage, the current dropped significantly. I got a weird reading a 1:30 when the current draw jumped up. I'm not sure what the deal is with that, but I measured a couple of times and got the same thing at that time. But with a current draw on Low of only 70mA, one Eneloop should give over 24 hours of very dim light. Both of the lower modes seemed to draw about the same current throughout the test.
Time (hr:min) Volts Current (mA)
0:00 1.45 1190
0:15 1.31 950
0:30 1.28 880
0:45 1.26 850
1:00 1.26 840
1:15 1.25 710
1:30 1.24 930
1:45 1.23 780
2:00 1.21 750
2:15 1.18 720
2:30 1.11 560
2:45 0.92 n/a
Light Output

The beam quality is decent, but on white walls there is a ring of darkness around the hotspot. Maybe the Cree XR-E ring sits up a little too high or too low in the reflector? I didn't try that hard to unscrew the pill, and I didn't want to tear up my new flashlight, so I couldn't try to tweak that. I don't think it would matter outdoors.

Indoor wall shots

I chose to compare the light to the Fenix L1D which has the same Cree XR-E Q5 LED and is about the same size. First I will compare both lights with a fully charged Eneloop 2000 mAh AA NiMH battery. The K106 is on the left and the Fenix is on the right. The Fenix has a yellower tint while the AKOray is mostly white with just a little blue (not as blue as it looks here). The lights are 50 cm from the wall. The camera is set to ISO 100 and a shutter speed of 1/25 second.

1/25th second exposure

Now at 1/100th second exposure. Now you can see the dark area around the hot spot:

1/100th second exposure

Now at 1/1600th second exposure. I think the Fenix is a little brighter. The Fenix is supposed to be 120 lumens with 1 AA.

1/1600th second exposure

Here is a picture of both lights on Low at 1/25th second. The Fenix is advertised with a 12-lumen low. I was able to get the AKOray pretty low, probably to about 8 lumens (on a lithium ion it battery it seemed about the same as the Fenix, so maybe 12 lumens).

Lights on LOW at 1/25 second

The Fenix is not designed to be used with lithium-ion batteries. If you use them, it loses all of its lower modes. So I will just compare the two lights on high with freshly charged blue protected Trustfire li-ion batteries. The first exposure is 1/25th second. Again, I think the Fenix is a little brighter. On 2 AA batteries, the Fenix is rated at 180 lumens, so with a higher voltage, this might be 200 lumens (maybe).

1/25th second exposure

Now at 1/100th second exposure:

1/100th second exposure

and at 1/1600th second:

1/1600th second exposure

Outdoors

The forked branch in the ground is 25 feet away. The light is aimed at fence posts that are about 120 feet away that you can barely see. The exposure is set to 4 seconds and ISO 100 to get something kind of close to what you actually see. Here is the light with a fresh 2000 mAh Eneloop AA NiMH battery.

NiMH High

I also took a picture of the light on low, but it is so low that nothing shows up (well you can barely see the forked stick).

NiMH Low

With the lithium-ion battery, the light is definitely brighter. You can see the fence posts better now:

Li-Ion High

On Low, even with li-ion batteries, you still can't see anything (the forked stick is barely brighter):

Li-Ion Low


Summary

This is a light I had my eye on for a long time, so I am glad to have it. I like the Fenix light I have, but this light beats it in most ways and is less than half the cost. Despite the difficulty in programming the levels I want, I am pretty happy with the fact that I can avoid flashing modes entirely and that it will remember the last mode I was in. It would be nice if it was a little easier to program and if it was a little brighter.


March 17, 2010

Zipper Repair

I have a windbreaker that I bought a few years ago at Sears. The zipper had problems fairly early on, getting stuck so badly one time that I broke the pull tab off and had to replace the ring that held it on with a piece I cut off of a safety pin. That held for a while, but lately it has been hard to get aligned correctly and when I tried to zip the jacket, the teeth didn't engage and the zipper would get stuck. Last Friday no matter how often I tried to get it to be aligned correctly, the jacket just wouldn't zip.

It is kind of late in the season to find a new jacket. I hoped there was some way I could repair the zipper, but I didn't look into it until Sunday evening. I found an about.com article saying how easy it is to replace the slider. They said the slider should have a number on the back of it indicating the size (I looked on the back of mine it said YBS 5, so I figured it was a size 5). Then all you have to do is go to a fabric store and find another slider the same size and, if they don't have the right color, choose one a little darker. Then you remove the zipper stop at the top of the zipper you have, which is just a bent piece of metal that clamps onto the cloth of the zipper. I was able to pry off the stop pretty easily and slide the old slider right off the top end. Maybe this really would be simple!

So Monday night I went to a fabric store and asked about zipper parts. They showed me a wall of different parts, but only a few were zipper parts. They had some individual sliders for $1.79 but they were the wrong size. Then they had a collection of at least 10 different size slides in a "zipper repair kit" and I could see a couple that looked like the right size and color, but the kit was $14.99. They said maybe it would be easier just to have a seamstress take off the old zipper and sew in a new one, but I was thinking there is no way anyone would do that for less than $14.99. But an alteration shop might have loose sliders they could sell to me pretty cheaply.

I thought this is the perfect kind of cheap thing I should be able to get from China, shipped directly to me, like some of the different flashlight and electronics I have been ordering lately. I started doing research online and didn't find any place like that. Wikipedia says the first zipper was manufactured in 1913 and the largest zipper factory in the world is owned by the Japanese company YKK and located in Macon, Georgia, with 900 employees. I did find that it is important not just to get the right size but to find out if the zipper has teeth or coils. Mine has teeth. One place had a number 5 slider for only 79 cents, but when I put it in my cart, they wanted $4.50 in shipping. I didn't want that. I checked some other jackets I had, but some of them had plastic zippers with a top stop fused into place. I don't know if you could easily replace that kind of slider.

So the next night I went to Walmart to see if they had parts. They had an awful lot of kinds of buttons, but no zipper parts. However they did sell entire zippers, including one for jackets that also had a number 5 on the back of the slider. The whole zipper was $2.79, so I got it. It is shiny gold instead of a dark metal color like my original. And I couldn't pry those zipper stops off of the replacement for anything, so I just cut the zipper in between two of the teeth to get the slider off (I didn't need that zipper anyway). It slid right onto my jacket's zipper. I slid it all the way to the bottom, lined up the bottom insertion pin in to the retainer box (Wikipedia terms) and it zipped up easier than it ever has before. Done!


March 16, 2010

Speeding Cameras

In an online discussion group recently, one guy commented about needing to keep an eye on his speedometer because they had installed a lot more speeding cameras lately. He is in the UK, but I thought that was interesting that they were giving speeding tickets automatically in other countries. Here we have red light cameras that send a ticket if you run a red light, but I didn't think there had been any speeding cameras installed yet. So I looked into it and it turns out that Arizona has been installing them lately. People really don't like these cameras and I found news stories about how people had sprayed silly string over the camera lens or stuck post-it notes on them to block their view. In Arizona, only 38% of the people who get tickets actually pay them. Instead a lot of people are protesting the tickets so, their court system is now clogged. They are booked through 2011 if you want to protest. Meanwhile you don't have to pay the ticket, so why wouldn't you protest? It's like 0% financing. An article in the LA Times says one guy has been caught 40 times in Arizona, most of the time wearing a mask. He plans on saying there is no way they can prove it is him driving the car. So far he has had 4 cases dismissed and had to pay on 7 others.

In the United Kingdom, the cameras have been in place for years, but they have tripled the number of cameras in six years according to this article. It says they are generating 100 million pounds in fines per year. As a result, a number of websites and databases have sprung up locating where the cameras are installed. This can then be put into a GPS navigation system which can warn you that one is coming up.

I was talking about red light cameras with some people at work and we figured that the cameras probably result in a lot more rear-end collisions since people will slam on their brakes when the light turns yellow. Sure enough, a Wikipedia article says a Virginia study showed that right-angle collisions dropped, but rear-end collisions increased, with overall accidents and accidents with injuries both increasing at intersections with red light cameras.

Undeterred, California is proposing to install speeding enforcement at intersections that already have red light cameras. Even if you go through a green light, if you are moving too fast, you would be photographed and sent a ticket. It's a pretty good idea because the equipment is all in place except maybe for the radar gun.


March 1, 2010

X2000 Flood to Throw Flashlight

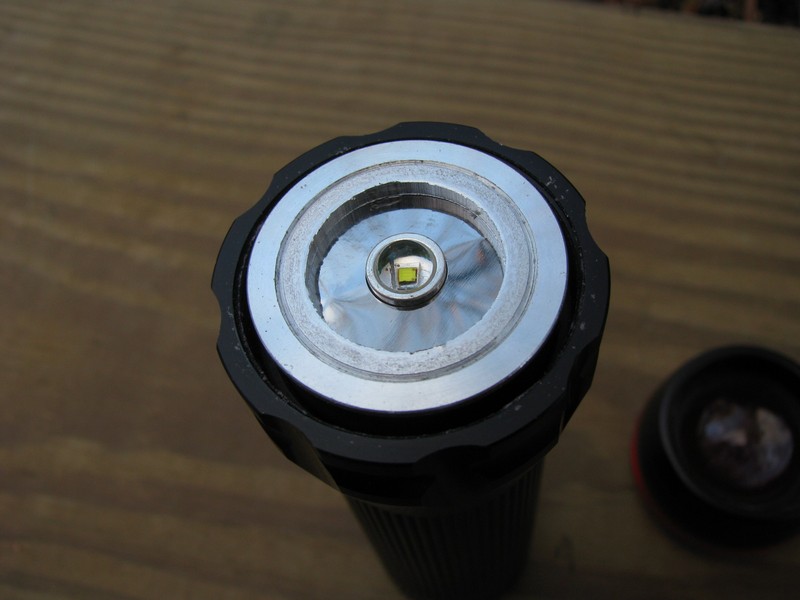
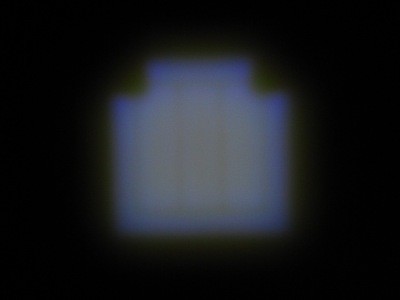
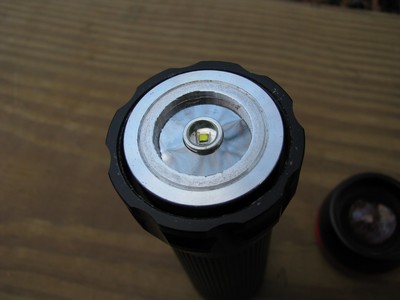
Some lights are good for general purposes, some are really bright, some have a really good user interface, and lights like this one are more of a gimmick. They do one trick, in this case, it is able to go from a fairly faint flood of even light to a tiny beam of light that can be thrown at least a hundred yards by using an aspherical lens that can be moved with respect to the LED. At the tightest spot, you are actually seeing a representation of the LED itself, including the 3 strips of a XR-E LED (picture below is of the beam projected onto the ceiling; in real life you can see more detail including some of the bonding wires).


Summary:

Battery: 3xAAA
Switch: Reverse Clicky
Modes: 3 (no memory)
LED Type: Cree XR-E Q5
Lens: Aspherical
Tailstands: Mostly
Price Payed: $13.98
From: eBay lovelycar8888

Pros:

  • Great throw
  • Bright
  • 3 modes
  • Uses NiMH batteries
  • Quickly goes from flood to throw

Cons:

  • Cheap construction
  • Not real practical
  • Bluish tint

Features / Value

There is a whole series of lights available on DealExtreme and elsewhere sometimes called the X2000 or C30. There are at least 3 battery configurations of the X2000 including CR123, 18650, and 3xAAA where the AAA batteries are put in a holder side-by-side and then the holder acts as one big 4.5V battery. These lights all have different overall lengths depending on the battery choice. All of the ones on DX advertise glass optics, but they all come with plastic optics according to reviews and comments. They also advertise Cree XR-E P4 LED's, but you can't really tell a P4 from a much brighter Q5 just by looking at it (at least the newer ones). One sold by KaiDomain and recently reviewed by Nautic here may be the best of both worlds, providing a holder 3xAAA batteries plus and extension tube allowing an 18650. A seller on eBay, lovelycar8888, sells a couple of versions of this light as well and promises a Q5 LED. However he also claims 220, 240, 260, or 280 lumens from his different offerings with various prices and there is no way a Q5 is going to produce 280 lumens. However, the light seems pretty bright and the LED looks just like the ones on my other Q5 and R2 lights. The tint is definitely cool white, distinctly bluish. It is one of my bluest lights, which I don't like. Part of the blue tint is from the LED, but holding the lens in front of another light I have, I noticed that some of the blue tint is coming from the lens.

I had a lot of questions when I bought the light. The first was did it have glass optics and the quick answer is no. The lens is plastic. That's a little disappointing. There is some definite chromatic aberration around the edges of the beam and I have to think glass could have reduced that some. Although the lens is set below the end of the front bezel (also plastic), it could still potentially be scratched.

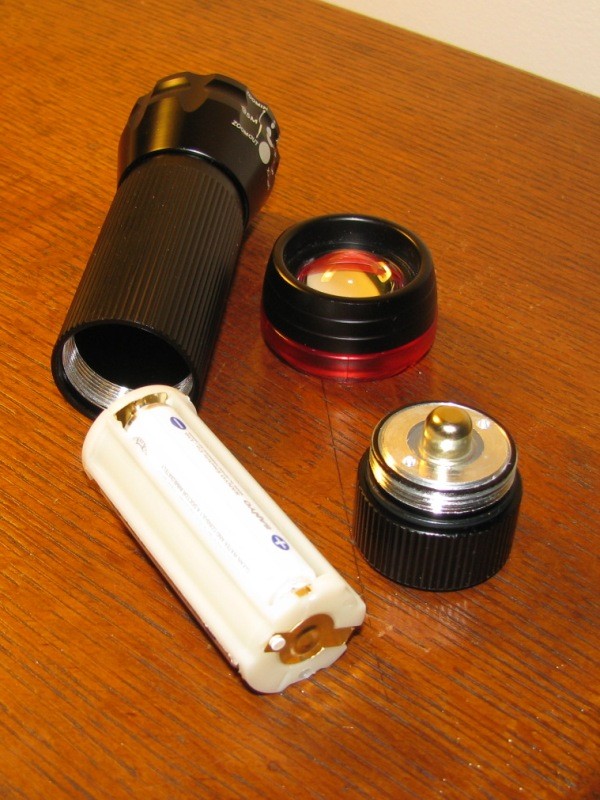
I also wondered if I could use a lithium-ion battery in place of the battery holder. NiMH batteries are nominally 1.2V each, so three of them are 3.6V, which is the same a li-ion battery. And certainly the light can handle 1.5V alkalines, so no problem with a voltage up to 4.5V. The interior of the aluminum body tube is 23 mm in diameter. The battery holder itself is 54 mm long by 22 mm diameter. So a 26500 or a 18650 won't fit, but a 18500 would and would provide about twice the capacity as the 3xAAA battery holder with NiMH's (a 14500 would be about the same as the 3xAAA setup, so I don't see the point). The 18500 would need some kind of sleeve or else it would rattle around.

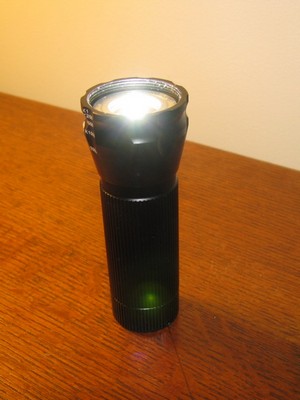
Although the tail switch protrudes very slightly, the light can still tailstand and it can go to candle mode if you unscrew the bezel (the green spot at the bottom is an artifact, not there in real life):

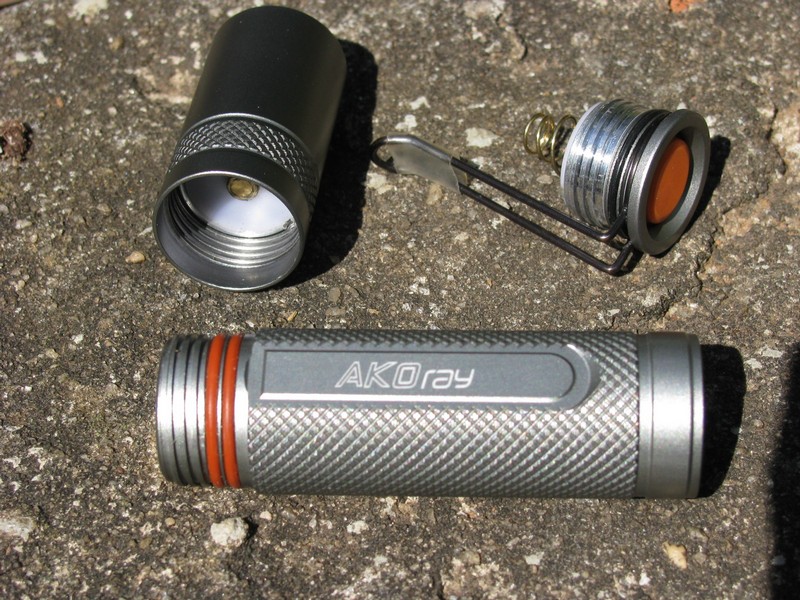
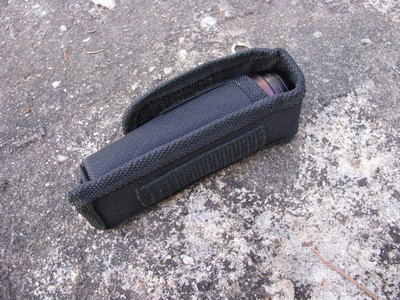
The light comes with a pretty weak looking lanyard, but the holster actually seems pretty decent, with a velcro closure flap and a substantial loop on back to slide onto a belt. If all of my lights came with those, I could wear them all at once!

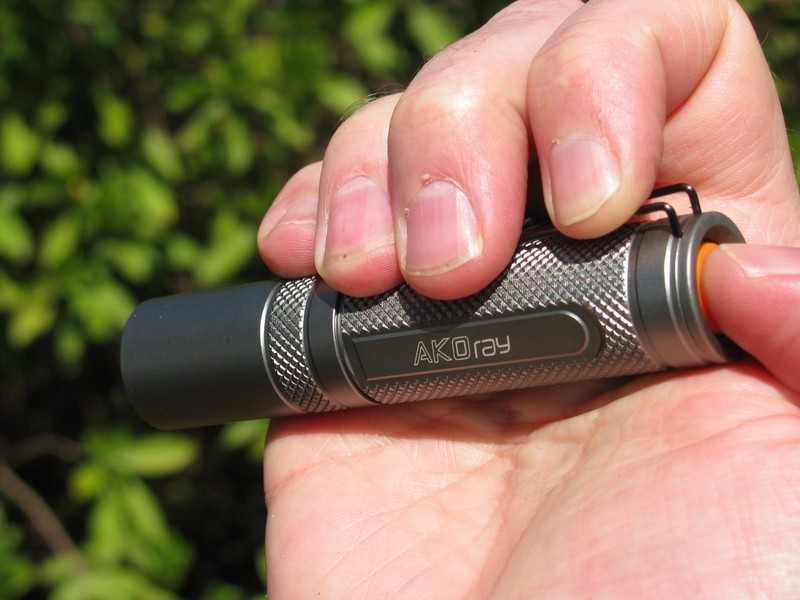
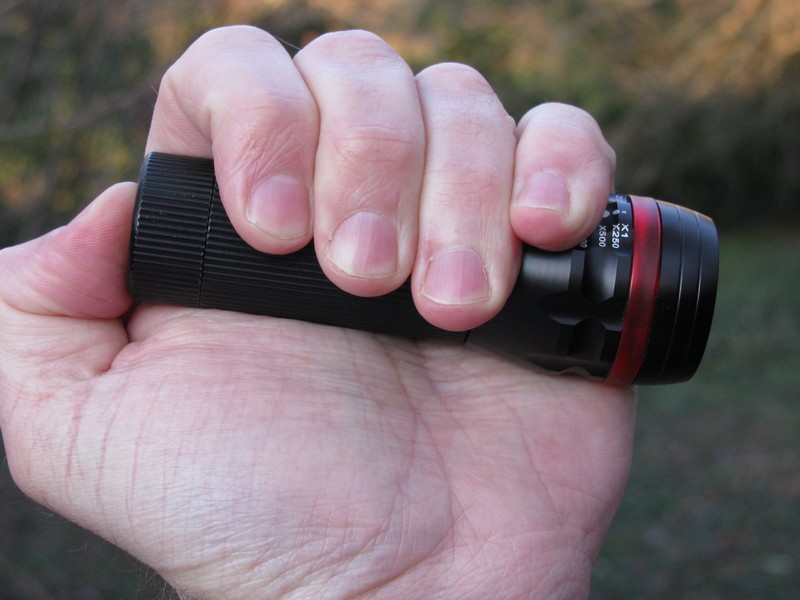
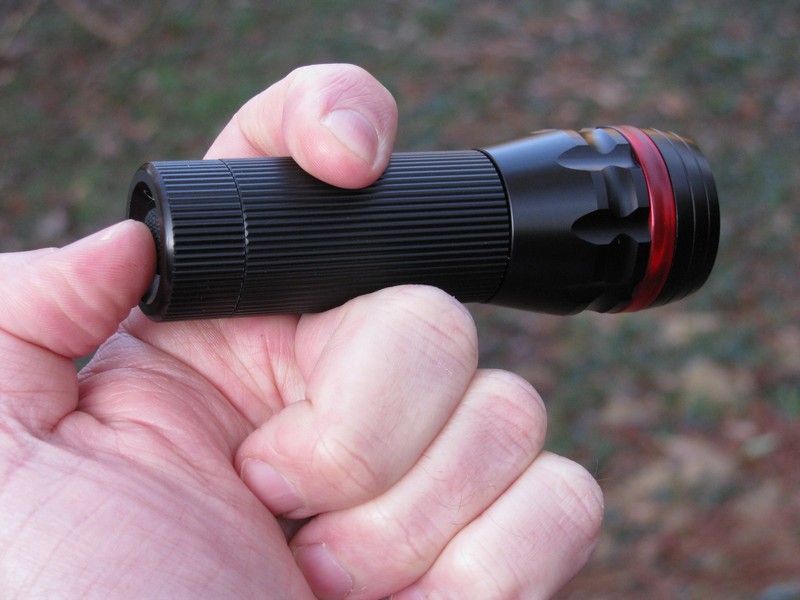
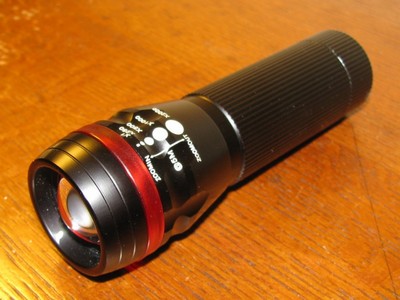
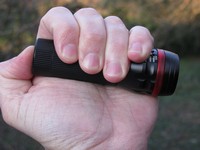
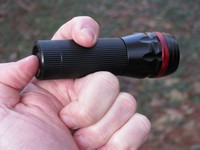
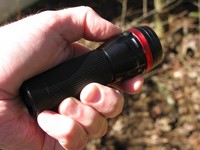
The head slides forward and back. I had read that other versions of the light were very loose and people had added a big o-ring to provide some additional friction. While looser than a camera zoom lens, the feel is in the same neighborhood as that and will stay where you set it for the most part There is 7mm of travel as the light expands from 104mm to 111mm in length. For me the problem was more that if I hold it overhand with my thumb on the tail clicky (first picture below), part of my hand is on the head and when I press the clicky with my thumb, my hand makes the head slide. Because the light is so short, it works better held like a cigar if you are going to be clicking it on and off (second picture). If you're not worried about turning it on and off, a regular grip works fine and you can adjust the focus with the same hand (third picture).

overhand grip

cigar grip

regular grip

I bought the light from eBay after someone at CPF said they had gotten one from the same seller and liked it. The ones on DealExtreme all advertise a P4, so I was willing to pay a little more for a better chance of getting a Q5. The guy has an e-mail address in Taiwan, but ships from Los Angeles and he is quick! Within a couple of hours he had put it in the mail. I ordered it on Friday morning and it was on my doorstep all the way across the country via first class mail on Monday morning! He sells what look to be all the same light, calling them a lot of different things and giving them different lumen ratings and prices. The light was shipped in a box and the light itself was in a smaller box inside (no bubblewrap!) and in the holster (below), so it was well-protected. The inner box had no markings indicating a model number or the LED, just "MADE IN CHINA." I paid $7.99 plus $5.99 shipping, but he also has a Best Offer option and later on I noticed someone had bought what seemed to be the same light I had for only $6.00 (plus shipping). DX sells the C30 for $9.52 and the X2000 for $13.35 plus other versions using CR123 or 18650 batteries. I should also point out that I tried to order a version without the red glowing ring, but got it anyway. If you don't want that, you should probably write to the guy and see if he has that available.

Build Quality

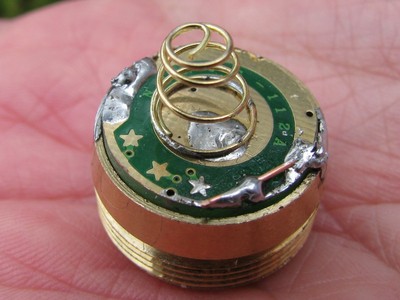
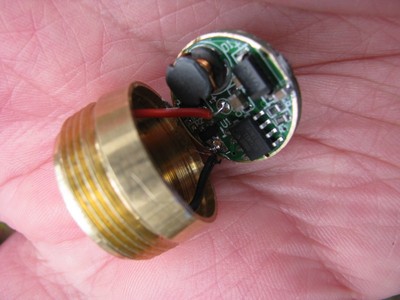
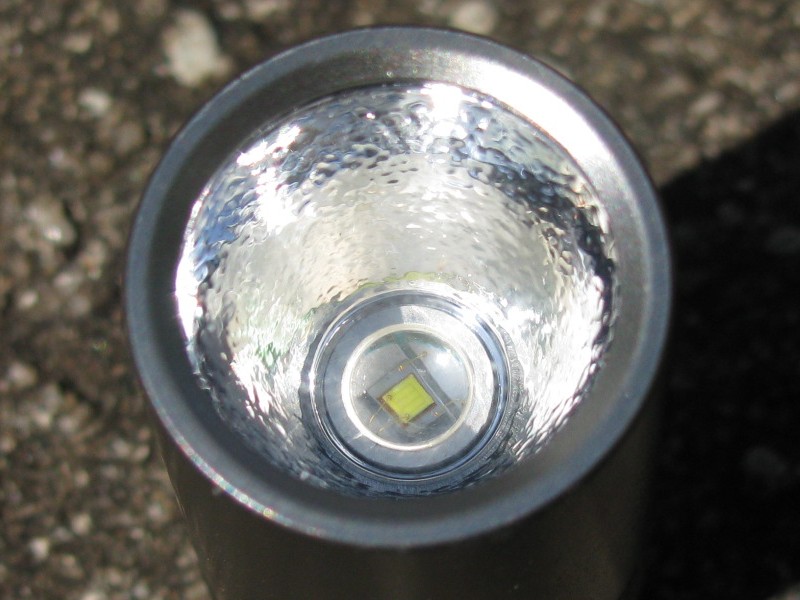
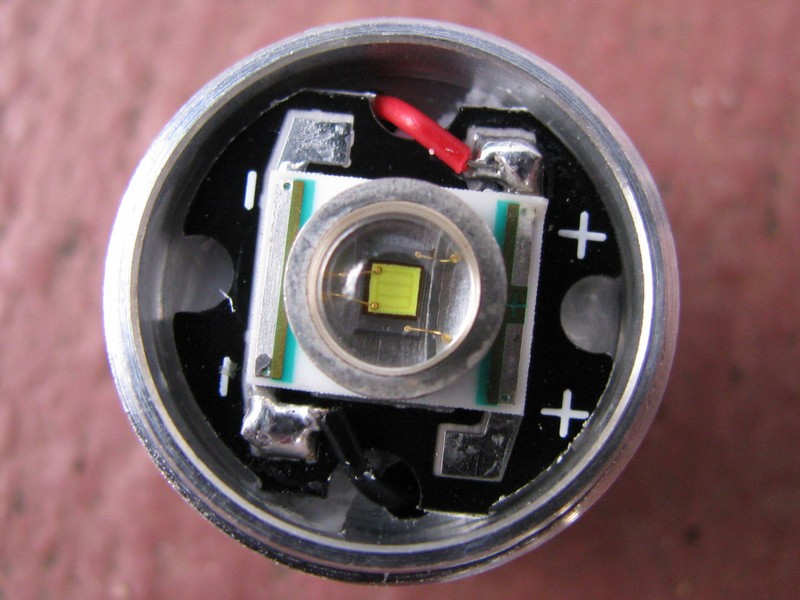
Build quality is okay. The entire head is made of plastic, including the plastic lens. The body and the tail seem to be aluminum, but it seems like sheet metal and the "anodizing" is more like a plastic coating. I may scratch it later and see. I have taken the bezel off (can't figure out how to take the whole head off) several times and the plastic threads are already showing some wear. You have to be very careful about threading them correctly or you risk doing some damage to them. The LED itself has some thin foil sheet around it and seems to be mounted underneath a substantial metal disk or washer. I can't get it apart any further to see what the LED is mounted to. Like I say, I couldn't get to the driver but I was able to pry it loose with tools from the tail end and I saw that it has some resistors and integrated circuits on it. Some early versions of the X2000 or C30 didn't have driver boards. Of course, having 3 modes pretty much means you have to have a driver. The tail clicky feels kind of cheap, but it works fine.

The light comes with a red transluscent plastic ring in the bezel that catches some light and glows. While that is a neat idea, I don't really want any light coming back to me like that, especially since I usually hold it up close to my face. In fact, I made sure I ordered an item that didn't look like it had the red ring, but I got it anyway. Some electrical tape should fix it.

Battery Life

The light barely gets warm, so I'm not sure how great the heat sinking is, or if the LED isn't being driven that hard. I can't measure lumens or even lux, so the best I can do is take readings from time to time of the current and voltage. In this case I am measuring the voltage of the 3 AAA's in their holder together, so the battery voltage would really be a third of this. I am using 800mAh AAA white-topped precharged Duracell batteries ("Duraloops"). The brightness seemed to drop quite a bit at around an hour. The batteries were pretty much depleted and the light was officially dim by 90 minutes.

Time (hr:min) Voltage High (mA) Medium (mA)
0:00 4.24 870 170
0:15 3.84 640 120
0:30 3.79 650 120
0:45 3.75 610 110
1:00 3.67 530 100
1:15 3.48 380 70
1:30 2.95 100 30

Light Output

The light has a Medium and High level, always coming on in Medium (it's not really a Low). This took some getting used to because Medium isn't too bad, but the light performs a lot better on High. It's probably good to be able to back off a little and I'm not sure a true low is needed since full flood on Medium is faint enough for close up use.

It is very hard for me to gauge the overall output of the light. The seller said it is a Q5 bin Cree XR-E, so it should be cranking out 180 lumens or so. Here are some indoor pictures just to give you an idea of how it compares to my Fenix L2D which is powered by 2 AA batteries and also has a Cree XR-E Q5 LED.

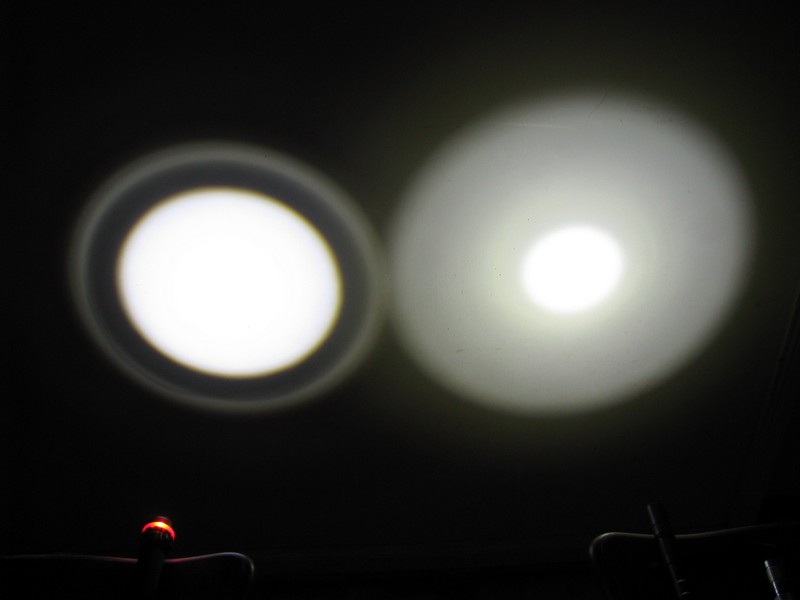
Indoor wall shots on High

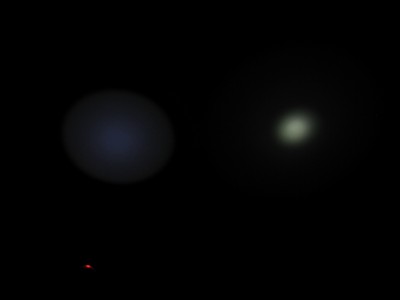
On High with full flood at 1/25th second with both lights 50cm from the wall with the ZY-30 on the left and the Fenix L2D on the right. All of the pictures in this review can be clicked on to open an image twice that size. You can see that the Fenix has a wider spill, but the ZY-30 has a more even flood (you can also sort of see the red glowing bezel in the lower left):

Again at 1/100th second exposure:

And again at 1/1600th second:

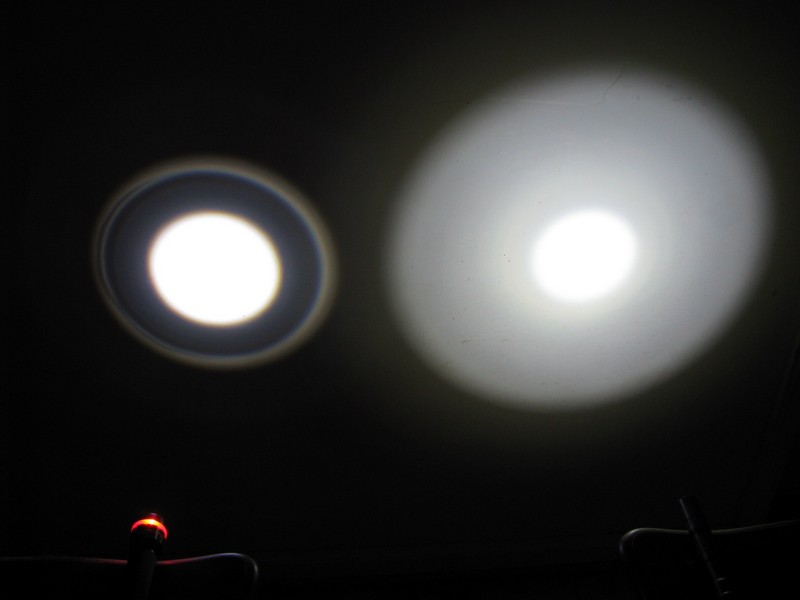
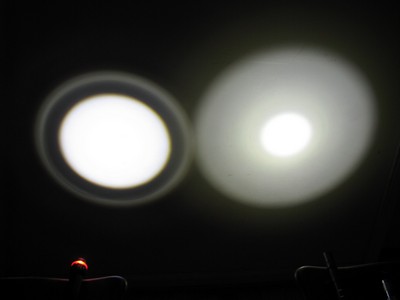
Now a series with the lens at about halfway between flood and throw. At this setting the hotspot on both lights are about the same intensity. At 1/25 second:

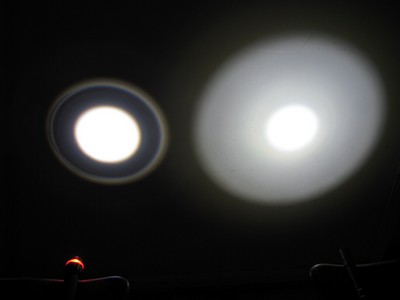
And at 1/100th second:
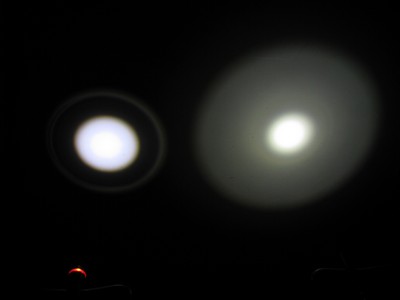
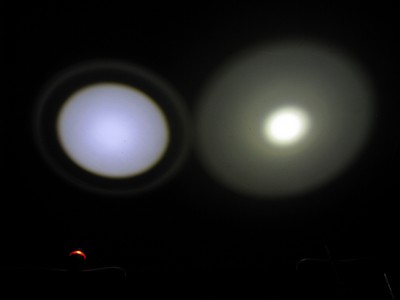
At 1/1600th second:

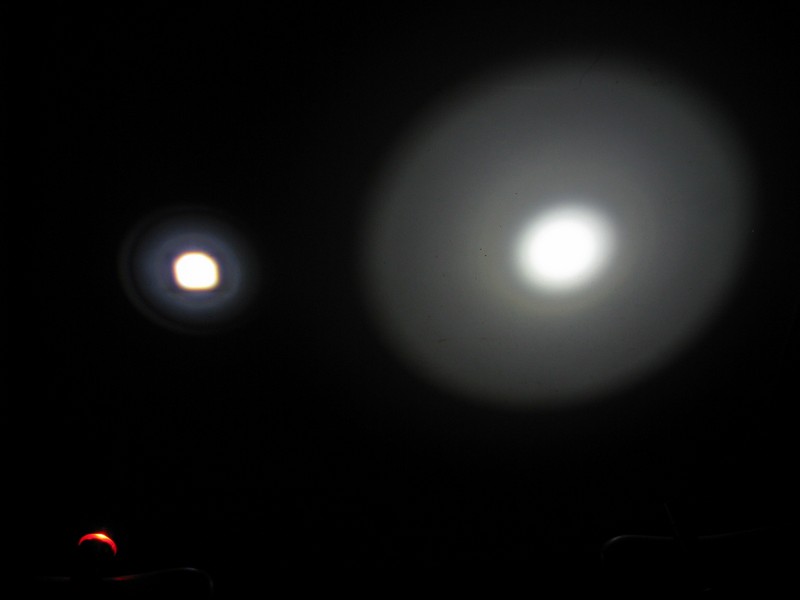
Finally, a series with the light on maximum throw, with a square beam of the emitter. At a close range like this, the emitter isn't a clear and you can't see the strips on the LED, but anything further than this, even outside at a distance, you can see the lines of the strips when the light is moving:
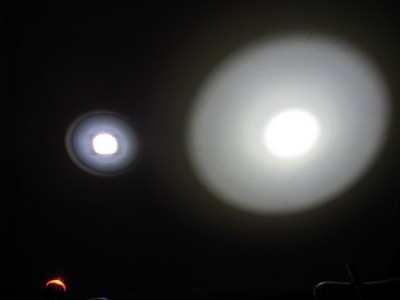
At 1/100th second:

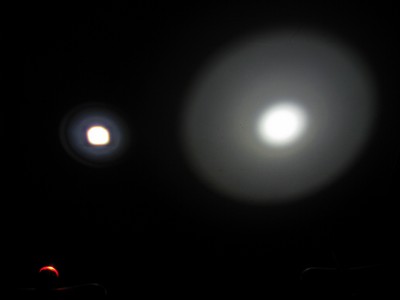
And at 1/1600th second. It's still pretty intense:

I took shots with both lights on Medium and can post that if you want, but this seems like a lot of pictures already.

Outdoor shots on High

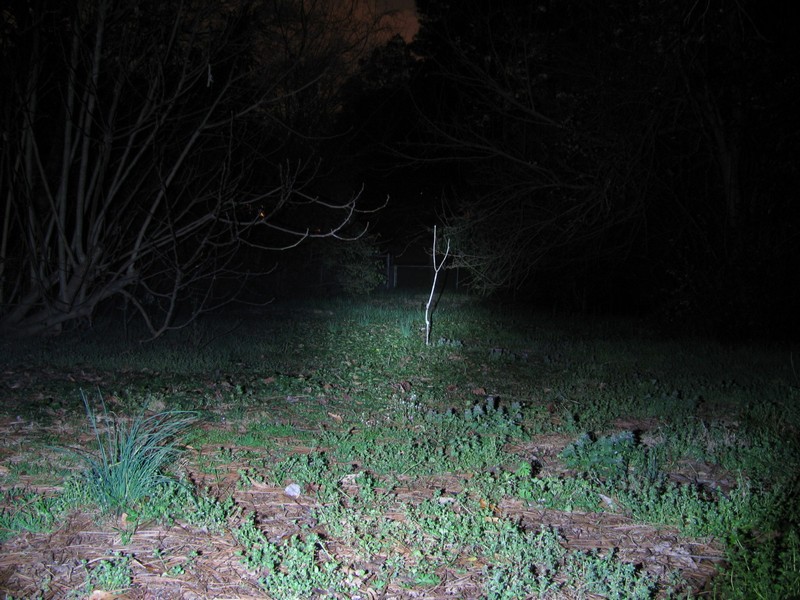
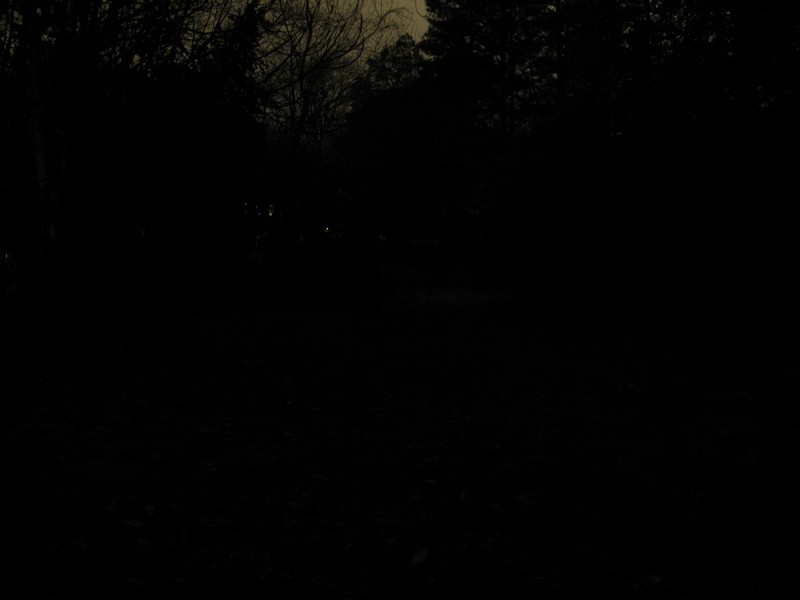
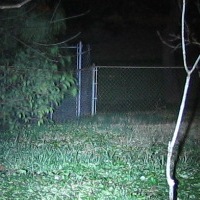
Well, you don't use a thrower indoors, that's for sure. So I'll just jump right to how this light performs on throw. But first, here is a control shot and then a reference shot. All of these are taken with a 4-second exposure to get something close to what it looks like in real life. First, the control shot (yes, it is dark):

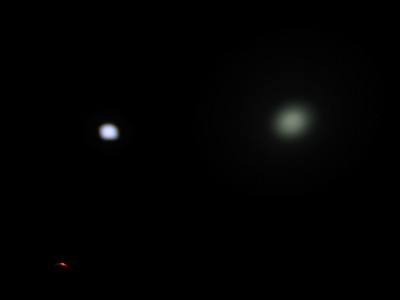
Now here is my best thrower, the Ultrafire MCU WF-1200L with a SSC P7 and a big head to focus the light, powered by two 18650 batteries. This is a lot of light, both in terms of spill and the hot spot. The forked stick is about 25' away and the beam is aimed at the fence posts in the middle of the picture which are about 120' away:

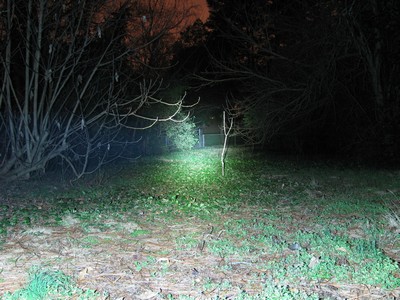
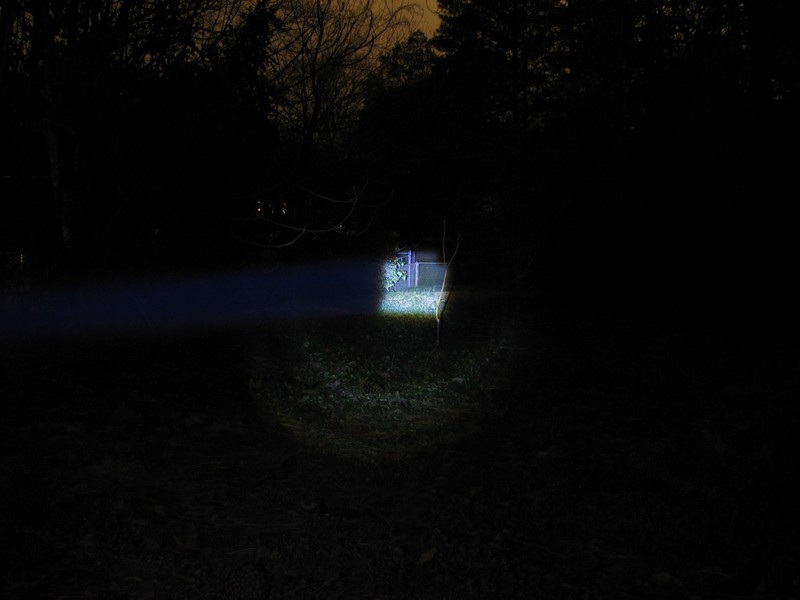
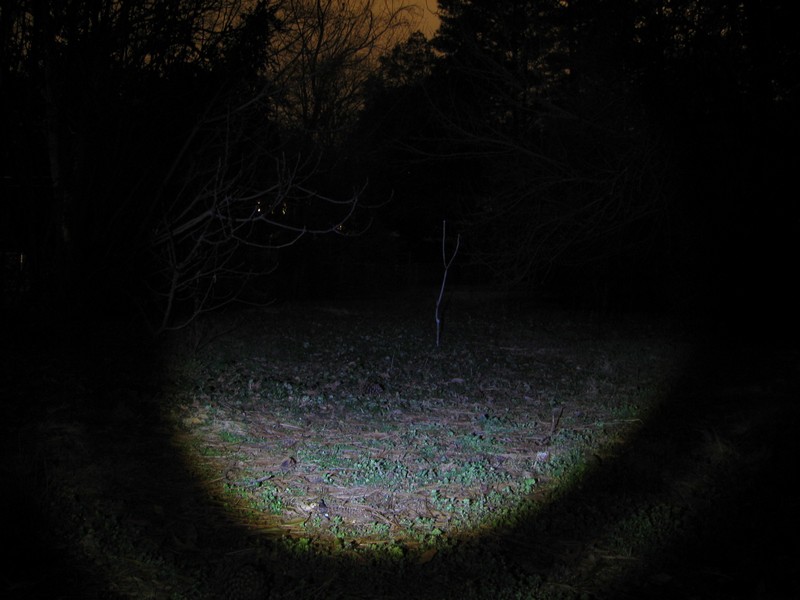
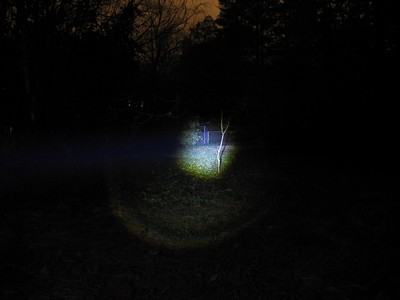
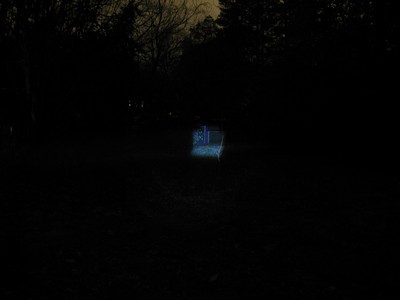
Now here is the ZY-30 on high and maximum throw. The fence posts are really lit up and they aren't all that reflective. Hardly any spill to speak of. I would say this light is very effective up to 100 yards and starts becoming much less useful at 200 yards.

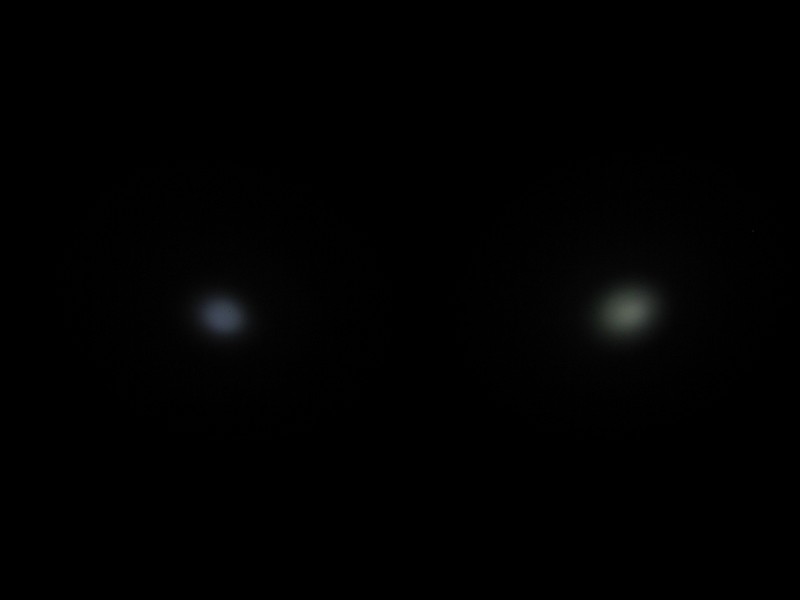
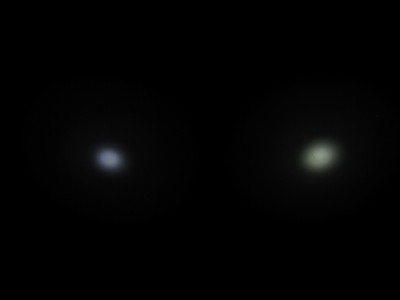
Here are pictures of the fence at original size side-by-side for comparison (can't click to enlarge these). Here I think the ZY-30 loses out, but the WF-1200L has a greenish tint that helps some:

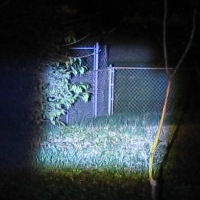
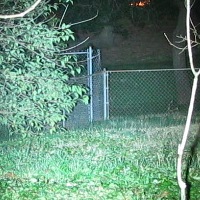
That's not an entirely fair comparison since the Ultrafire puts out up to 600 lumens, so here is another good thrower, the Ultrafire WF-504B with a XR-E R2 drop-in. The R2 is a little higher bin than the Q5, but in the same neighborhood. There's no question the ZY-30 wins out here:

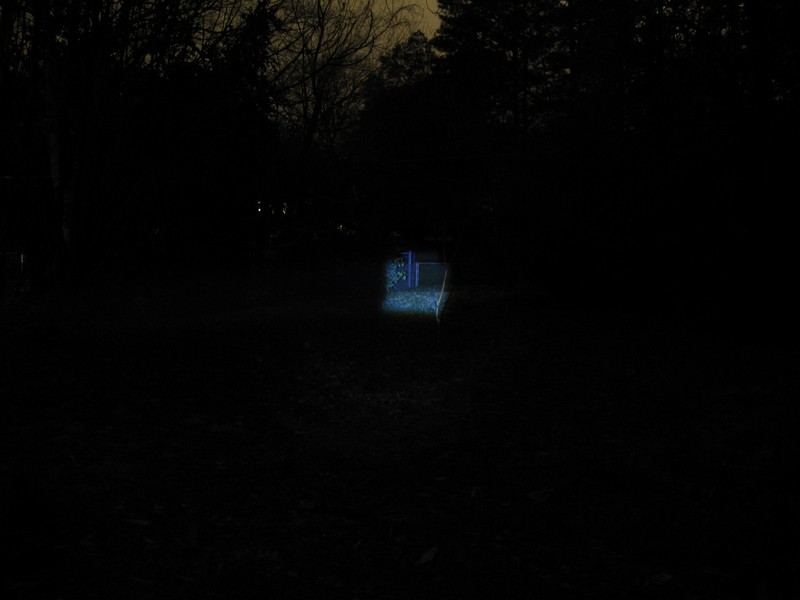
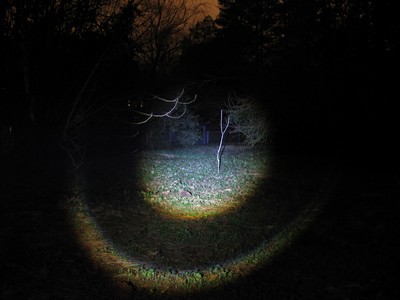
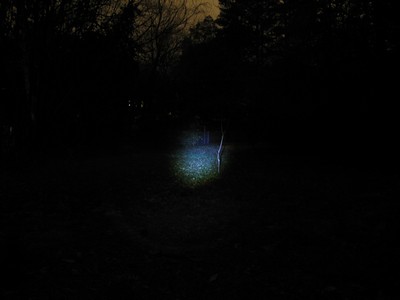
Now here is the ZY-30 at about 75% towards throw, which produces a fairly tight, round spot:


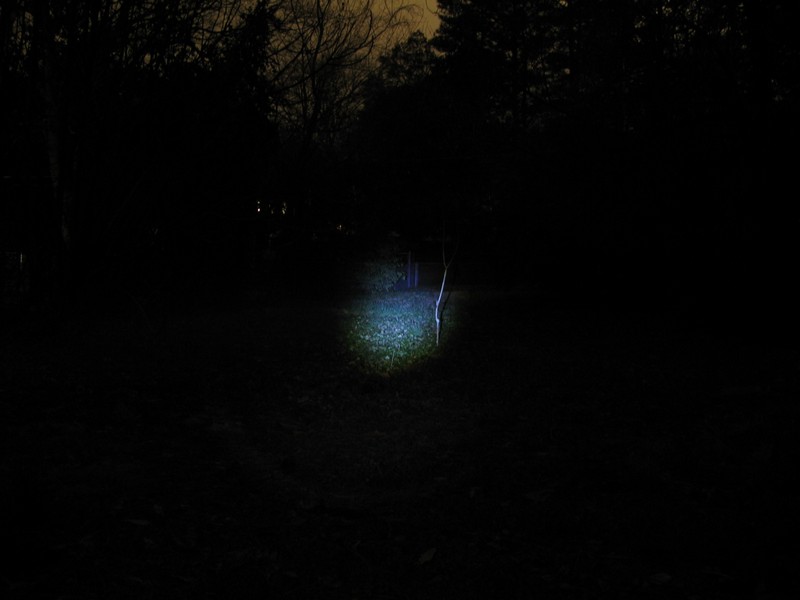
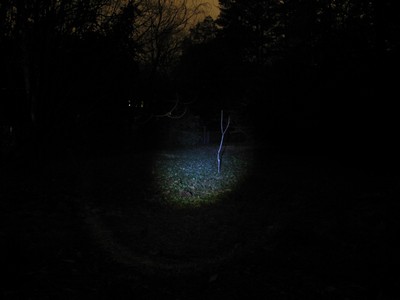
Now at about 50% throw. You can see the ugly outer ring and the chromatic aberration around the edges:

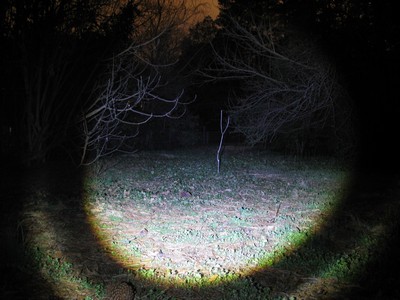
Now backed out all the way to flood. It's a lot of light, but it drops off pretty fast. You can barely see the fence posts and the stick is at about the edge of its useful range:

Outdoor shots on Medium

Now here is the light on medium, the same series as above. Medium seems to be about a third of High, but I'll have a better idea when I take current readings later. Medium uses PWM which isn't too bad, but I'm not as sensitive as some. I will say that it was very hard catching any light at all on 1/1600th because of the PWM. Anyway, here are the outdoor shots on Medium:

100% throw:

75% throw:

50% throw:

Flood:

Summary

This is a fun toy, but the throw could be really useful for spotting objects at about 100 yards. It is not a light I would carry regularly though. I wish I knew what I was really getting in terms of the LED or even the lumen output, but the description on DealExtreme and eBay are both full of conflicting or just plain bad information.