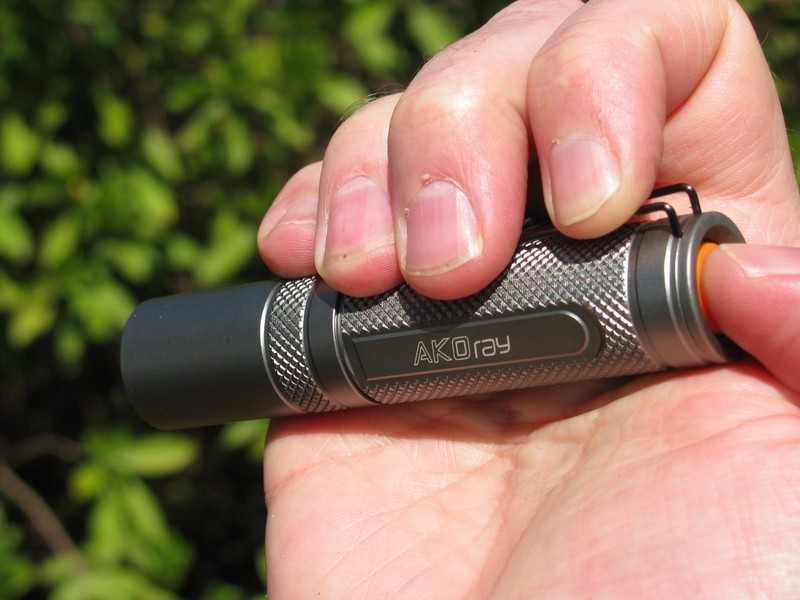
AKOray K-106 3-mode Programmable
This light has already been reviewed once by sb56637, so this is just my take though the conclusions are mostly the same. This light is very popular among flashlight enthusiasts due to having 3 programmable modes and remembering the last mode you were in. Most budget lights always include one or more strobe modes, including this one where the default settings are High, Low, and Strobe. So it is very nice to be able to get rid of the strobe mode. Also 3 modes provides a very good mix. One mode will always be maximum, and it is nice to get a good low of less than 10 lumens for looking at things up close. The middle mode can either be closer to max to give good output but longer battery life, or closer to to low, especially if the low is set very, very low. The ability to program levels puts this light in league with other programmable lights like the JETBeam, Liteflux, and the Nitecore D10.

| Battery: | AA or 14500 li-ion |
| Switch: | Reverse Clicky |
| Modes: | 3-mode, programmable with memory |
| LED Type: | Cree XR-E Q5 |
| Lens: | Glass |
| Tailstands: | Yes |
| Price Payed: | $19.20 |
| From: | KaiDomain |
Pros:
- 3 programmable modes
- Very good build quality
Cons:
- Difficult to program
- Not as bright as I hoped
- Poor tail clicky
I put off buying this light from DealExtreme because people seemed to report some crazy high current draws, blue tints, and then lately the erroneous "6-mode" description the light has always had has been turning out to be correct. I certainly didn't want to get stuck with a 6-mode light, especially for $6 more than the 5-mode light. Even the description at KaiDomain is a little misleading, saying it has 3 modes plus variable output when really all 3 modes are programmable.
All of the pictures here can be clicked on for a version twice the size shown.
I won't try to explain how to program the light. There is already a good writeup here. However, I will comment on the difficulty I had in programming this light. First the tail switch seems a little grabby. When I press it, it seems like it is resisting a little, even when I let go it feels like it is sticking some. It is one of the worst clickies I've come across. So that affects the operation a little since you have to half-click five times to get to programming mode. I had a really hard time getting to programming mode, but now I have a pretty good method that works most of the time. I turn the light on then halfway hold the button so the light is momentarily off. I do this for five seconds (everything on this light seems to be set around a 5-second off) and then let go to turn the light on. Now I halfway press five times to get into programming mode. I have to do this pretty quickly and sometimes I think I still just end up setting battery protection (3 half-clicks) or just end up 5 modes past where I was.
You know you are in programming mode because the light flashes once, then waits a few seconds before starting a brightness ramping sequence that is quite fast. By the time you realize what is going on, you are halfway to max. Therefore I think it is best to set the first mode to High by half-clicking at the end of the first brightness ramping or waiting for the light to flash off and back on again where it holds high for a couple of seconds. Then, after two flashes to indicate Mode 2, set the next one to low by pressing as soon as you see any light. Then after 3 flashes wait until ramping reaches a good medium and turn the light off (not a half-press or you'll be back to Mode 1). Now you have programmed H-L-M, but with the memory and cycling through the modes, that is the same as L-M-H. It is easy to set High, but not at all easy to set a good Medium or catch the lowest Low. It took me a lot of tries to get a very low Low and a decent Medium along with High (and in the right order, sometimes it would H-M-L).
Using an ampmeter at the tail, you can test to see if you are getting the separation you really want. Using a fresh Eneloop, I measured 0.04A, 0.28A, and 1.36A. I could use a little higher Medium, but the Low is very low. So to program the light, you have to be very quick, and also know what you are doing. This will come with time, but certainly is not easy with the light right out of the box. The other modes are a double-blink mode and a variable strobe. There may be two different speeds of the double-blink available. The strobe is variable from pretty slow to quite fast which is a neat idea. The SOS mode is really SOSO (though as other have pointed out, if they are looking for a lost camper at night, I don't think rescuers would just ignore someone flashing SOSO). The variable strobe and SOS are much easier to pick out of the ramping sequence. If the brightness ramping was slower, this would be a much better light. In fact, if they offered 6 fixed brightness levels to choose from like the Quark tactical versions, that would allow more defined control and would be enough levels to make most people pretty happy. If this was a high-end light, I don't think people would tolerate the awkward ramping, but because it is a $20 light, people are glad to have the feature for the price.
Build Quality
Build quality is very good. The finish is not as dark as some other "natural" lights that I have, but I like it well enough. I've never understood how having a glow-in-the-dark tail cap can be that useful (the only way to make it glow outdoors is with another flashlight, but if you have another flashlight, you won't have any problem finding this light; so about the only time it would help is in a power outage where the light is sitting out already and the room goes from bright to pitch black). My Fenix uses an orange tailcap, so the Akoray orange works well too. Here are 4 "natural" colored lights: the iTP A3 EOS, AKOray K-106, Fenix L1D, and the Uniquefire S10 (which is called silver, but has a light mint-green color).

The knurling and exterior finish are very good. There were no flaws, chips,or scratches. There is something about the diamond knurling and the light-colored finish that makes the surface look like it is almost glowing. The closer you get, the better it looks.
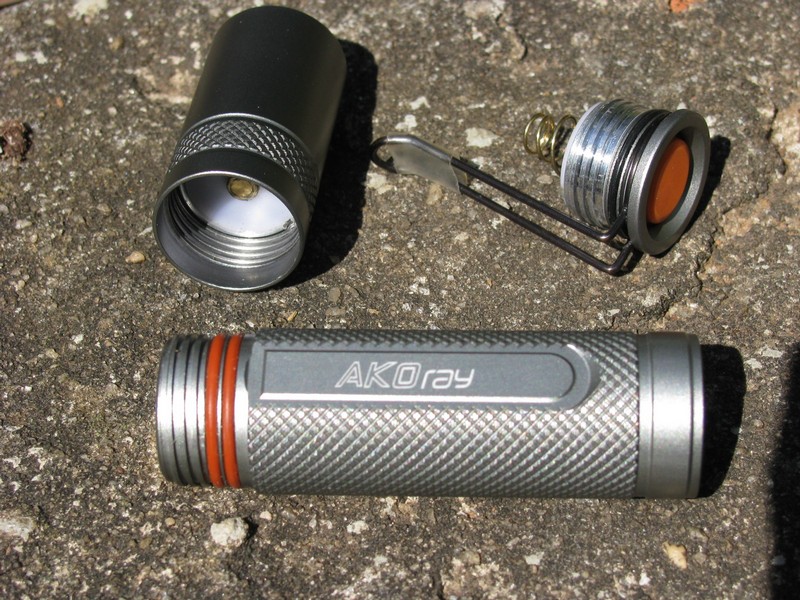
The threads are big and rectangular which people seem to like more than triangular ones. They seem well made. There was a chalky squeak when I took the head off the first time from the anodized threads rubbing, but the tiniest amount of lube solved that. With a little more on the o-rings, this things feels very smooth. The only thing is that it seems like the head should screw on a little more than it does, leaving a small gap.
I didn't see how the light could be waterproof with the clip's wires sticking into holes in the side until I removed the tailcap (this is a very thin tail cap, not like any other light I have, and not one you will want to unscrew regularly) and saw that the ends of the wires are outside of the tail switch boot and the holes don't affect the watertight integrity.
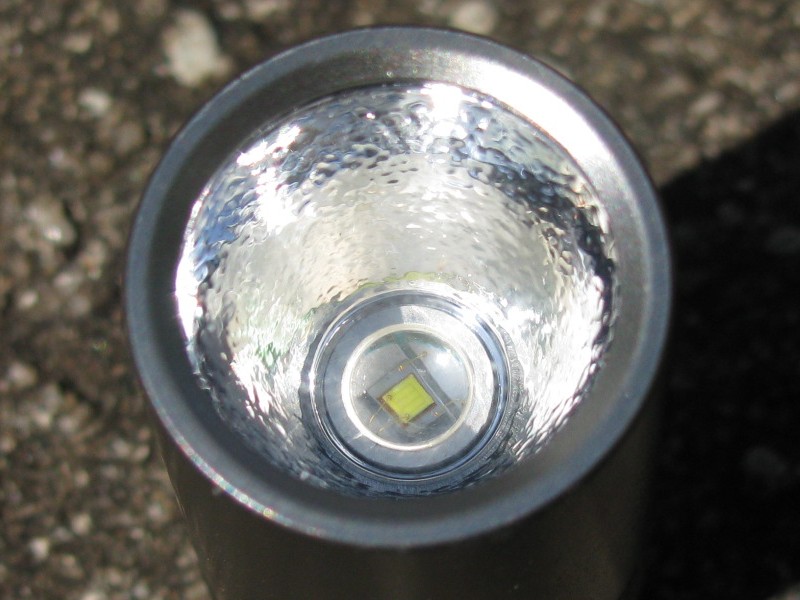
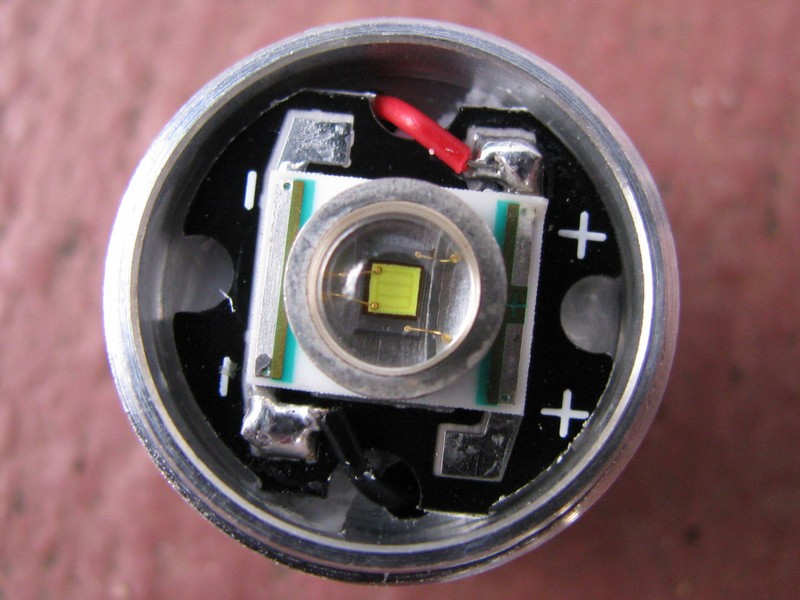
At first I wasn't able to unscrew the pill out of the head, but with some small needle nose pliers bearing on two small slits, I was able to unscrew it. The reflector is aluminum and the lens is glass. There was a plastic piece over the LED to keep the reflector from making contact. Usually it is just a piece of plastic film or paper, so that is pretty good. The LED just sits on the pill, so I decided to order a Cree XP-G R5 to put in there. It seems like others have had mixed success with that upgrade. One person on CPF loves his, but another said he got blinking which seemed to indicate an overheating alarm. We'll see. It's kind of an expensive upgrade ($10.90 at KD). I'm still not sure how to actually open the pill. There is a plastic disk on the bottom with a brass center instead of the usual circuit board soldered in place.

Battery Life
I have a pair of Trustfire 14500 lithium-ion batteries. They are 900mAh blue protected cells. I run the light and stop every 15 minutes to check the voltage on the battery (not under load) and the current draw (under load) at the tail until the battery gets down to 3.6V. I ran a test on the first one and it was so short that I ran another test on the second cell and got basically the same results. First cell:
| Time | Volts | Current (mA) |
|---|---|---|
| 0:00 | 4.21 | 610 |
| 0:15 | 3.91 | 660 |
| 0:30 | 3.69 | 720 |
| 0:45 | 3.55 | 770 |
| Time | Volts | Current (mA) |
|---|---|---|
| 0:00 | 4.22 | 600 |
| 0:15 | 3.93 | 670 |
| 0:30 | 3.68 | 740 |
| 0:45 | 3.58 | 770 |
| Time (hr:min) | Volts | Current (mA) |
|---|---|---|
| 0:00 | 1.45 | 1190 |
| 0:15 | 1.31 | 950 |
| 0:30 | 1.28 | 880 |
| 0:45 | 1.26 | 850 |
| 1:00 | 1.26 | 840 |
| 1:15 | 1.25 | 710 |
| 1:30 | 1.24 | 930 |
| 1:45 | 1.23 | 780 |
| 2:00 | 1.21 | 750 |
| 2:15 | 1.18 | 720 |
| 2:30 | 1.11 | 560 |
| 2:45 | 0.92 | n/a |
The beam quality is decent, but on white walls there is a ring of darkness around the hotspot. Maybe the Cree XR-E ring sits up a little too high or too low in the reflector? I didn't try that hard to unscrew the pill, and I didn't want to tear up my new flashlight, so I couldn't try to tweak that. I don't think it would matter outdoors.
Indoor wall shots
I chose to compare the light to the Fenix L1D which has the same Cree XR-E Q5 LED and is about the same size. First I will compare both lights with a fully charged Eneloop 2000 mAh AA NiMH battery. The K106 is on the left and the Fenix is on the right. The Fenix has a yellower tint while the AKOray is mostly white with just a little blue (not as blue as it looks here). The lights are 50 cm from the wall. The camera is set to ISO 100 and a shutter speed of 1/25 second.

Now at 1/100th second exposure. Now you can see the dark area around the hot spot:

Now at 1/1600th second exposure. I think the Fenix is a little brighter. The Fenix is supposed to be 120 lumens with 1 AA.

Here is a picture of both lights on Low at 1/25th second. The Fenix is advertised with a 12-lumen low. I was able to get the AKOray pretty low, probably to about 8 lumens (on a lithium ion it battery it seemed about the same as the Fenix, so maybe 12 lumens).

The Fenix is not designed to be used with lithium-ion batteries. If you use them, it loses all of its lower modes. So I will just compare the two lights on high with freshly charged blue protected Trustfire li-ion batteries. The first exposure is 1/25th second. Again, I think the Fenix is a little brighter. On 2 AA batteries, the Fenix is rated at 180 lumens, so with a higher voltage, this might be 200 lumens (maybe).

Now at 1/100th second exposure:

and at 1/1600th second:

Outdoors
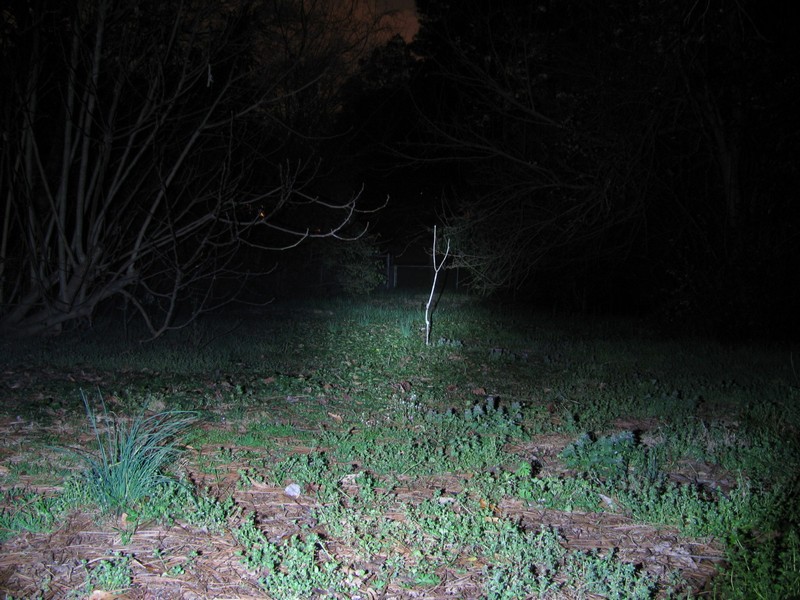
The forked branch in the ground is 25 feet away. The light is aimed at fence posts that are about 120 feet away that you can barely see. The exposure is set to 4 seconds and ISO 100 to get something kind of close to what you actually see. Here is the light with a fresh 2000 mAh Eneloop AA NiMH battery.

I also took a picture of the light on low, but it is so low that nothing shows up (well you can barely see the forked stick).

With the lithium-ion battery, the light is definitely brighter. You can see the fence posts better now:
On Low, even with li-ion batteries, you still can't see anything (the forked stick is barely brighter):

Summary
This is a light I had my eye on for a long time, so I am glad to have it. I like the Fenix light I have, but this light beats it in most ways and is less than half the cost. Despite the difficulty in programming the levels I want, I am pretty happy with the fact that I can avoid flashing modes entirely and that it will remember the last mode I was in. It would be nice if it was a little easier to program and if it was a little brighter.
| Permalink
| ![]()