Uploading Photos in MovableType
Including one or more photos in a blog entry is a little tricky, but once you've done it a few times, it is easy. You may want to print out this tip to use the first few times.
1. Export Medium Size Photos
Before you start you need one or more photos that you are going to post on the web. Photos taken with digital cameras are LARGE for printing to photo paper. When viewed on the web, these large photos will be too big for the screen and take too long to view.
Using your photo software export your photo to a size that is somewhere between 500 to 800 pixels wide. I usually choose 600 for horizontal photos and 400 for verticle photos. (Don't worry about the height. Let it auto-calculate.) Export them to your desktop so you can easily find them in the next step.
Name the file using dashes instead of spaces. For example: jake-radar-begging.jpg.
2. Create a New Blog Entry
Go ahead and create a new blog entry. In this example I've given the title "Dog Shots" and chosen the category "Dogs". You can optionally type your blog in Word or Notepad before creating the new entry. This lets you use spell check, and you are less likely to lose your work, which sometimes happens if you click on something in your browser.
3. Choose "Upload File" from the menu.
4. Click on the "Browse" button.
In the "Upload File" window, click on the "Browse" button to locate your photo on your desktop, or wherever you saved it. After choosing the file, click on the "Upload" button.
5. Set the Options.
I think this is the trickiest step because you have to think about three different things in one window.
I typically choose the second option "Show me the HTML" instead of creating a new entry because I typically start off writing about the entry first. This means you will be copy/pasting some HTML clode that MovableType will create for you.
To create a thumbnail photo, you have to remember to check the "Create a thumbnail" option. You then need to set the "Width" of the thumbnail. (You can let the Height auto-calculate.) I typically set the width to 150 or 200 pixels. You can think of about your blog entry being about 600 pixels wide, so you are taking up about 25% of the width of your blog entry with a thumbnail.
Then click on the "Embedded Image" option. I'll explain the other option later.
6. Copy the HTML.
MovableType creates the HTML code that will display your thumbnail and the link to the medium size photo. Highlight all of this code and choose File... Copy... (or ctrl+C or command+C on a Mac.)
7. Paste the HTML Into Your Entry
Now switch to your new entry window (or Notepad or Word) and paste the code into your entry.
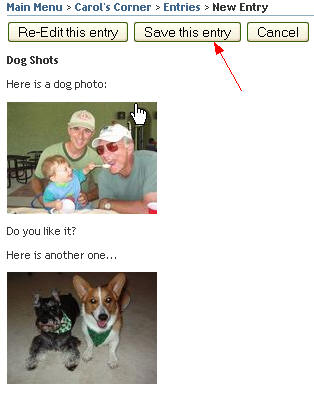
8. Preview Your Results.
Click on the Preview button at the bottom to see how your thumbnail looks.
Re-edit the entry if you need to finish writing about your photos. To move the photo up or down in your entry, just cut / paste the code higher or lower in your text. When you are done "Save".
Other Tips:
Use the "Pop-Up Image" option to create a thumbnail that pops-up into a separate window. The code is a little more complicated, but since you are copying and pasting, it doesn't create any more steps.
If you want text to word-wrap around the thumbnail and/or if you want a border to be around the thumbnail hand type:
border="1"
align="right" or align="left"
after the width height parameters in the code. For example this image will have a 1 pixel border and will align right with text floating around it:
<img alt="photos-step6.jpg" src="http://mac.fiveforks.com/jeb/blog/photos-step6.jpg" width="314" height="407" align="right" border="1"/>

That is amazing. You certainly did a wonderful job and nobody should have any excuses about uploading pictures. I'm printing it out and saving.